What is supabase?
Supabase is an open-source database, authentication system, and hosting platform that allows developers to quickly and easily build powerful web-based applications. It provides an API that enables developers to connect, query, and manage data on their web projects and mobile applications.
Using Supabase you can quickly and easily get started building anything from hobby projects to fully functioning database back-ends. Supabase provides REST APIs (using PostgREST) , GraphQL and realtime functionality out of the box. However, the best feature as far as we're concerned is that your database is just standard Postgres.
How can we receive email with Supabase?
In March 2022 Supabase announced Edge Functions (https://supabase.com/blog/supabase-edge-functions). Supabase Edge Functions are a great way to extend the capabilities of your project without adding more complexity. Edge Functions are serverless functions that are hosted on a reliable cloud platform like AWS Lambda and are triggered by events, such as when a user interacts with your application. They can also be called via HTTP allowing us to add custom logic to our database application without having to maintain additional hosting and infrastructure.
Edge functions are automatically deployed to 29 regions across the globe placing the code near your users (or in this case our email servers).
There are a number of tutorials covering getting started with Supabase and setting up edge functions so we're not going to cover that here. However, lets look at our workflow for receiving inbound emails with Supabase.
What will our workflow be for receiving email?
In order to receive email we'll be using CloudMailin's email to webhook service (this is CloudMailin.com after all). CloudMailin allows you to receive any volume of email via normal HTTP POST. CloudMailin was built for the Cloud and is a cloud-first design. As serverless functions have evolved so has CloudMailin's architecture to allow us to receive email with serverless functions. CloudMailin parses and delivers email as JSON or multpart/form-data (we'll be using JSON) and can even extract email attachments so that we don't have to handle that in our serverless functions.
So that takes care of the email to webhook part of our task. The steps will be:
- Creating a CloudMailin account
- Creating our database schema to hold our incoming email messages
- Adding a function to help us insert new records
- Creating and deploying our edge function
So lets get started.
Creating a CloudMailin account
In order to receive the email we'll need a CloudMailin account. You can sign up for free and get started receiving email in minutes. We'll walk through the setup a little later in this article but can create the account now.
Receive email with Supabase
I'm going to assume that you have the Supabase client installed (if not, head to supabase.com and get things setup). Now lets create our database table:
supabase init # only if you don't already have a project
supabase migration new create_incoming_emails
# Created new migration at supabase/migrations/20230316120917_create_incoming_emails.sql.
Creating our database schema to receive email
Now lets open the file and create our database table:
-- Create the incoming_emails table
create table "public"."incoming_emails" (
    "id" uuid not null default uuid_generate_v4(), -- Define the ID column as a UUID with a default value
    "message_id" text not null, -- Define the message ID column as text and require it to be non-null
    --- Extract just the to, from and subject columns from the message for convenience
    "to" text not null,
    "from" text,
    "subject" text,
    "full_message" jsonb not null, -- Define the full message column as JSONB and require it to be non-null
    "created_at" timestamp with time zone default now()
);

-- Enable row level security on the incoming_emails table
alter table "public"."incoming_emails" enable row level security;

-- Create a unique index on the message_id column
CREATE UNIQUE INDEX incoming_emails_message_id_key ON public.incoming_emails USING btree (message_id);

-- Create a unique index on the id column
CREATE UNIQUE INDEX incoming_emails_pkey ON public.incoming_emails USING btree (id);

-- Add a primary key constraint on the id column
alter table "public"."incoming_emails" add constraint "incoming_emails_pkey" PRIMARY KEY using index "incoming_emails_pkey";

-- Add a unique constraint on the message_id column
alter table "public"."incoming_emails" add constraint "incoming_emails_message_id_key" UNIQUE using index "incoming_emails_message_id_key";
We've got comments to show exactly what's happening but we're creating a new
table called incoming_emails and adding to, from, subject and full_message.
The column full_message is a JSONB column which will hold the full payload
received as JSON in case other fields are needed in future. We're also adding a
created_at column to track when the email was received.
Then we're enabling row level security on the table and adding a unique index on
the message_id column and setting up a primary key.
We could use the message ID for this but using a UUID will make it easier to use in our client applications in future.
Great, that's our database schema created. Now lets add a function to help us insert new records.
Creating a Supabase edge function to receive email
As we mentioned above, Supabase edge functions are distributed around the world and make use of the Deno runtime. We're also going to be using Typescript here to help us with prompts containing the data available to us.
Lets start by creating a new function with the console:
supabase functions new receive_email
This will create a new folder in the Supabase directory with a function ready to send and receive JSON.
import { serve } from "https://deno.land/std@0.168.0/http/server.ts";

console.log("Hello from Functions!");

serve(async (req) => {
  const { name } = await req.json();
  const data = {
    message: `Hello ${name}!`,
  };

  return new Response(
    JSON.stringify(data),
    { headers: { "Content-Type": "application/json" } },
  );
});
Now we can test that out by serving the function locally:
supabase functions serve
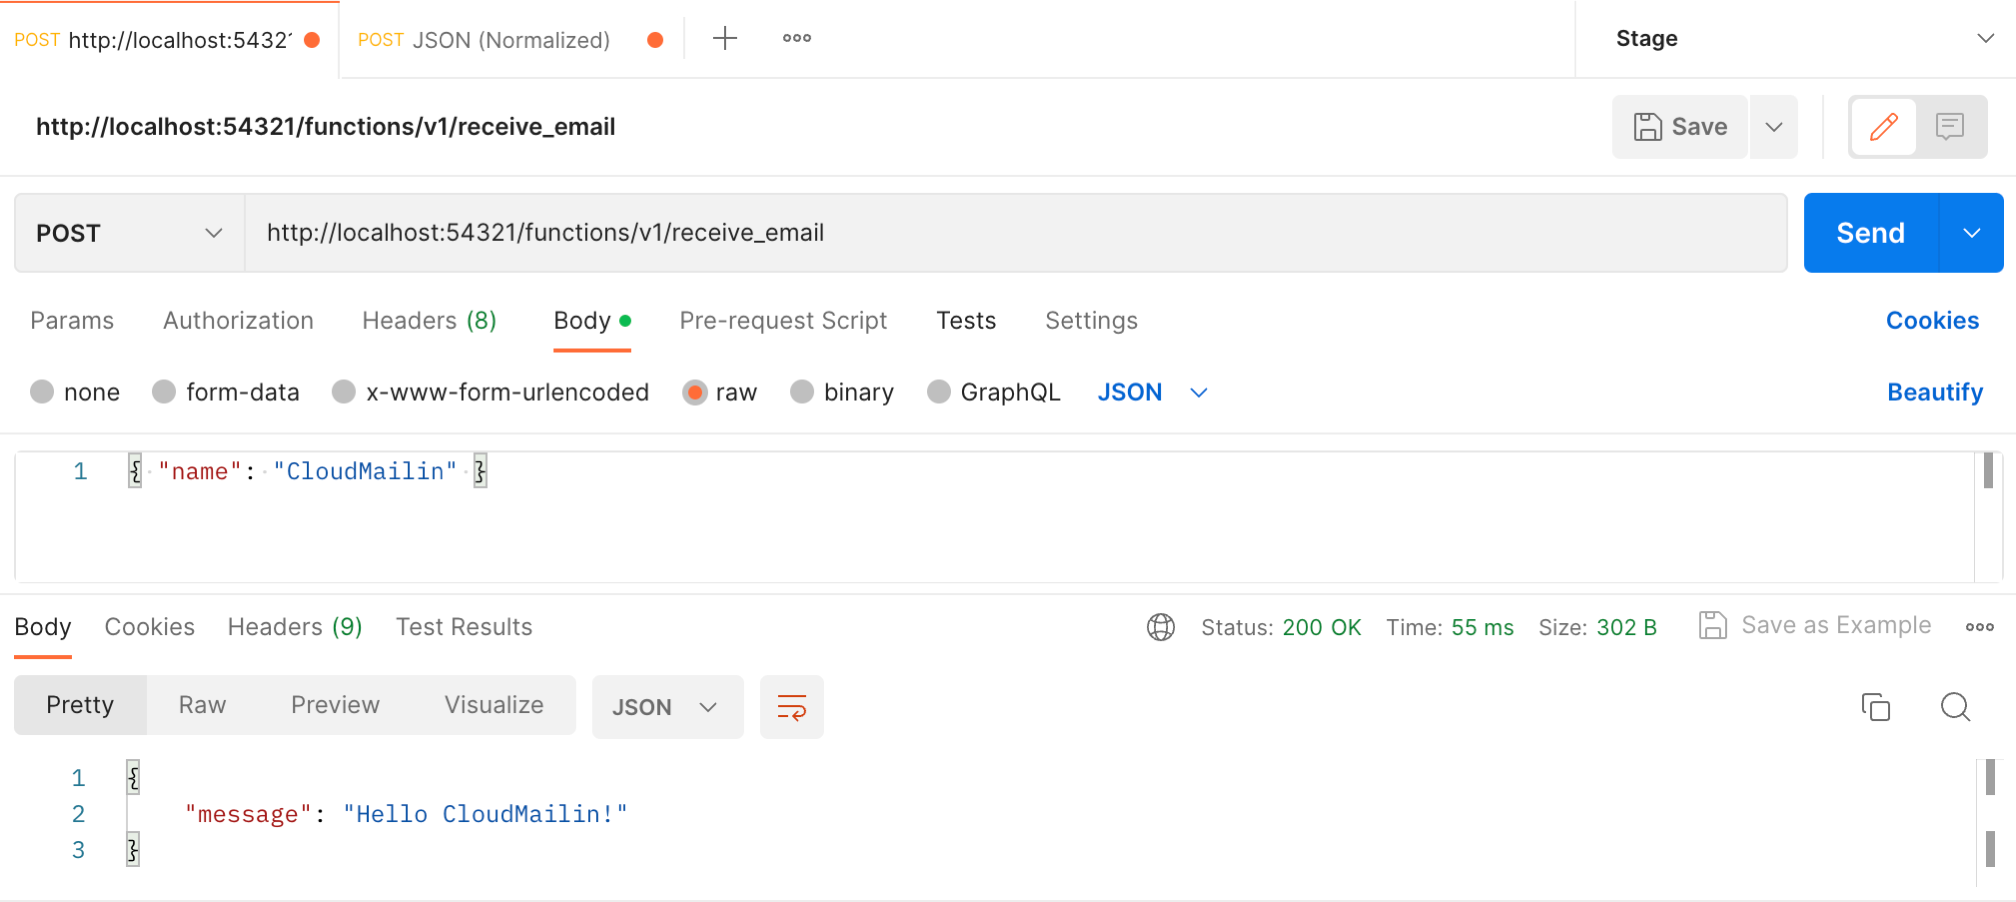
This starts our functions server locally, which can be accessed via the built-in gateway running on localhost:54321. In order to access the server we'll call http://localhost:54321/functions/v1/receive_email. In the example we'll use Postman to make the request and pass CloudMailin as our name:
Updating our function to Receive email via HTTP & JSON
Great, that's working so we can now add some code to receive our email from CloudMailin. When setting up CloudMailin we'll need to choose the JSON (normalized) format as it will be easiest to work with in Typescript.
In order to make things easier we're going to pull in the CloudMailin types from
the npm package cloudmailin and use them to help us with our types. To
do this in Deno we're going to use esm.sh to fetch the files we need.
import { serve } from "https://deno.land/std@0.168.0/http/server.ts";
import { IncomingMail } from "https://esm.sh/cloudmailin";

console.log("Listening for email");

serve(async (req) => {
  try {
    const email: IncomingMail = await req.json();

    const data = {
      message: `Hello ${email.envelope.from}!`,
    };

    return new Response(
      JSON.stringify(data),
      { headers: { "Content-Type": "application/json" } },
    );
  }
  catch (e) {
    console.log(e);

    return new Response(
      JSON.stringify({ error: e }),
      { headers: { "Content-Type": "application/json" } },
    );
  }
});
We import the IncomingMail type from the Cloudmailin package and use it to type the email variable. This will help us with our code completion and make it easier to work with the data. With that in place we'll output the value of the from field in the envelope to make sure we're getting the data we expect.
Full details about the structure of the email object can be found in the CloudMailin JSON documentation.
Again we'll use Postman to check this, except we can make use of the CloudMailin example JSON to represent a real email that was received previously. These are linked in the Testing a Format Docs. This time we should see a Hello message but we should see:
Hello from+test@cloudmailin.net!
Persisting our email to webhook in the database
Now that we've got our code receiving email via HTTP we'll need to persist it in our Supabase PostgreSQL database. We'll update the function to the following:
import { serve } from "https://deno.land/std@0.168.0/http/server.ts";
import { IncomingMail } from "https://esm.sh/cloudmailin@0.0.3";
import { createClient } from "https://esm.sh/@supabase/supabase-js@2.14.0";
import { Database } from "./types.d.ts";

console.log("Listening for email");

serve(async (req) => {
  try {
    const email: IncomingMail = await req.json();
    const supabaseClient = createClient<Database>(
      // Supabase API URL - env var exported by default.
      Deno.env.get('SUPABASE_URL') ?? '',
      // Supabase API ANON KEY - env var exported by default.
      Deno.env.get('SUPABASE_ANON_KEY') ?? '',
    );

    const messageId = email.headers.message_id;
    const subject = email.headers['subject'];

    const data = {
      to: email.envelope.to,
      from: email.envelope.from,
      subject: Array.isArray(subject) ? subject[0] : subject,
      message_id: Array.isArray(messageId) ? messageId[0] : messageId,
      full_message: JSON.stringify(email)
    };

    const { data: output, error } = await supabaseClient
      .from("incoming_emails")
      .insert([data])
      .select('id');

    if (error) { throw (error); }

    return new Response(
      JSON.stringify(output),
      { headers: { "Content-Type": "application/json" }, status: 201 },
    );
  }
  catch (e) {
    console.log(e);

    return new Response(
      JSON.stringify({ error: e }),
      { headers: { "Content-Type": "application/json" }, status: 500 },
    );
  }
});
We've added a few changes. First, we've imported the Supabase client and then created a new instance of it using the environment variables that are automatically set up for us when we deploy our function. We've also created a structure to hold the email content that maps to the database structure we created earlier. We then insert the email into the database returning the ID if it's successful or an error if there's an error.
In addition we import a type definition for the database structure from the generated types file. This can be created with the following command:
supabase gen types typescript --local --schema public >| supabase/types.d.ts
Now if we call this function we should get a response containing the ID of the inserted message. However, we don't. We get the following error message:
{
    "error": {
        "code": "42501",
        "details": null,
        "hint": null,
        "message": "new row violates row-level security policy for table \"incoming_emails\""
    }
}
Handling row level security
In order to avoid the error we need to do one of two things. We could either allow the anonymous user to insert data into the table (by adding a create policy or disabling row level security), or we can use a different user to insert the data.
Because CloudMailin is a system and we trust that our function can't be
manipulated to do any damage, we actually want to use the Service Role in
order to insert our data.
However, we don't want to allow just anyone to access this function. CloudMailin doesn't support Supabase's JWT authentication (yet), but we can add a basic authentication username and password to our function to protect it from random access.
Let's modify our code to the following:
import { serve } from "https://deno.land/std@0.168.0/http/server.ts";
import { IncomingMail } from "https://esm.sh/cloudmailin@0.0.3";
import { createClient } from "https://esm.sh/@supabase/supabase-js@2.14.0";
import { Database } from "./types.d.ts";

console.log("Listening for email");

serve(async (req) => {
  if (req.headers.get('authorization') !== "Basic Y2xvdWRtYWlsaW46cGFzc3dvcmQ=") {
    console.log(`Auth headers: ${req.headers.get('authorization')}`);

    return new Response(
      JSON.stringify({ error: "username / password required" }),
      { headers: { "Content-Type": "application/json" }, status: 401 },
    );
  }

  try {
    const email: IncomingMail = await req.json();
    const supabaseClient = createClient<Database>(
      // Supabase API URL - env var exported by default.
      Deno.env.get('SUPABASE_URL') ?? '',
      // Supabase API ANON KEY - env var exported by default.
      Deno.env.get('SUPABASE_SERVICE_ROLE_KEY') ?? '',
    );

    const messageId = email.headers.message_id;
    const subject = email.headers['subject'];

    const data = {
      to: email.envelope.to,
      from: email.envelope.from,
      subject: Array.isArray(subject) ? subject[0] : subject,
      message_id: Array.isArray(messageId) ? messageId[0] : messageId,
      full_message: JSON.stringify(email)
    };

    const { data: output, error } = await supabaseClient
      .from("incoming_emails")
      .insert([data])
      .select('id');

    if (error) { throw (error); }

    return new Response(
      JSON.stringify(output),
      { headers: { "Content-Type": "application/json" }, status: 201 },
    );
  }
  catch (e) {
    console.log(e);

    return new Response(
      JSON.stringify({ error: e }),
      { headers: { "Content-Type": "application/json" }, status: 500 },
    );
  }
});
Basic authentication just performs a base64 encoding of the username and
password, adding the Basic prefix to an authentication header. In this case
we're using the username cloudmailin and password put these together and we
get cloudmailin:password. Base64 encoded we now expect to find
Basic Y2xvdWRtYWlsaW46cGFzc3dvcmQ=.
If we don't see this header we simply return a 401 error so we're now free to
use the Service Role key to insert our data.
Because we're using basic authentication we're not too worried about anyone making it to the 500 error below when the authentication is not present. In addition to this, CloudMailin will capture the error and ask the sending email server to retry on a 5xx status code. Therefore, we're going to record the actual error and pass it out as part of the response to help debug if needed.
If we test this out locally we should now see the the ID of the inserted message as the JSON response to our email:
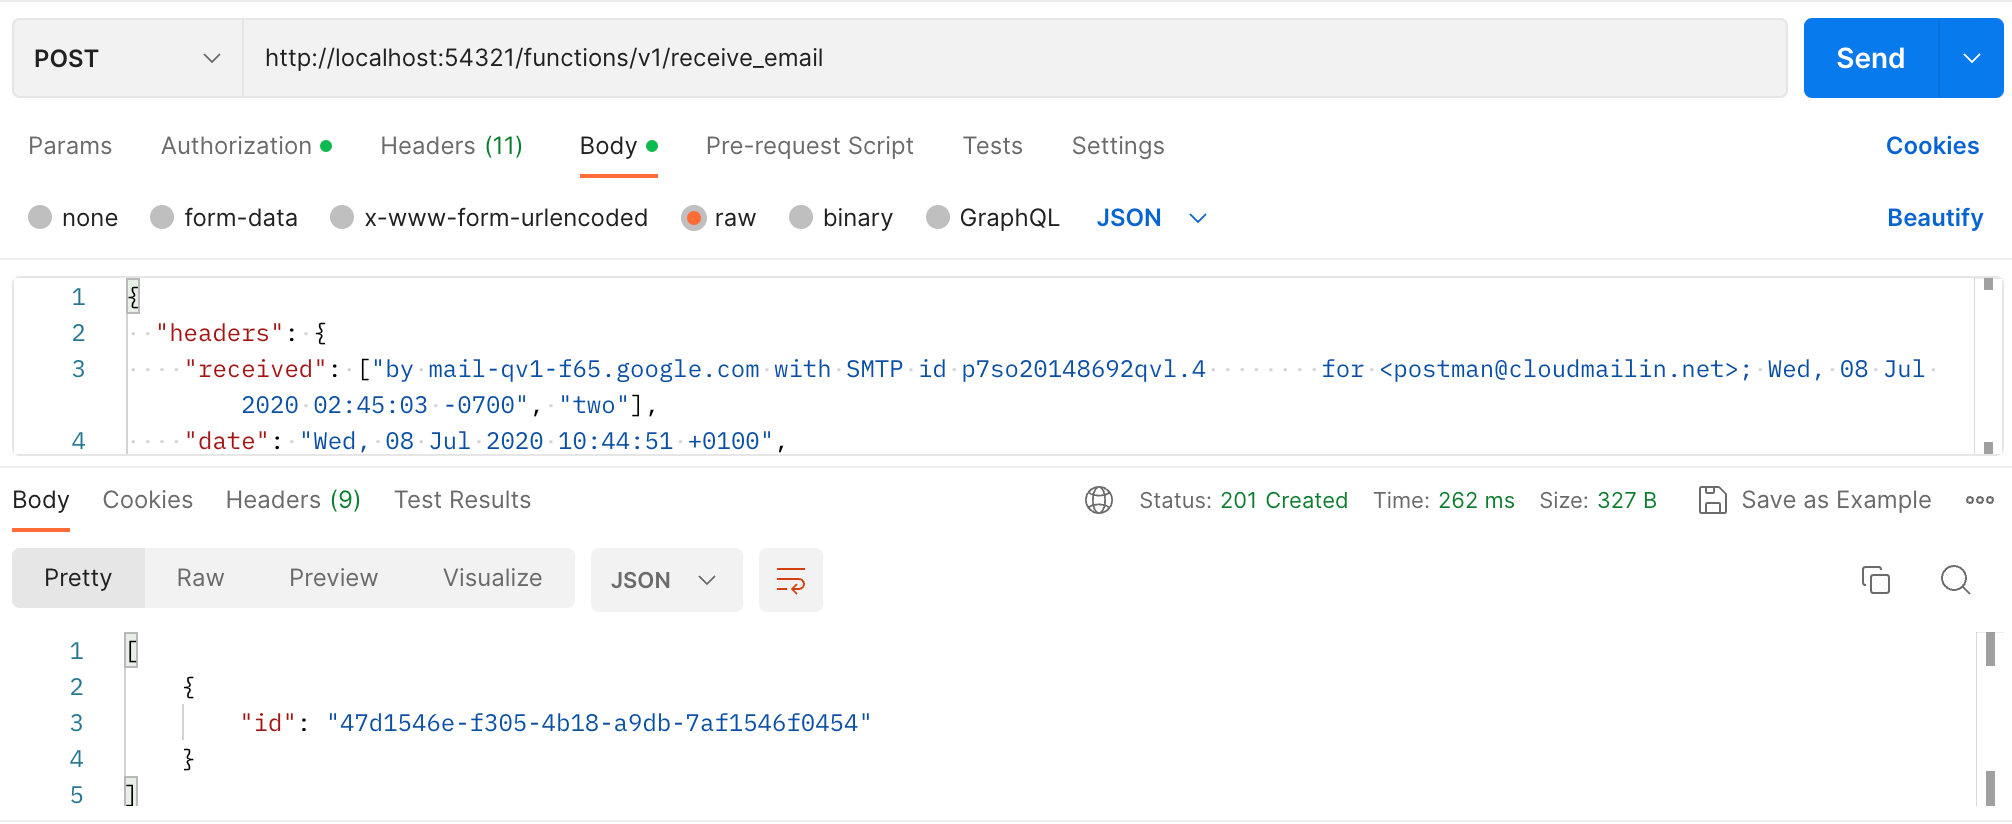
Great! That's just what we wanted. We can now deploy this function to Supabase.
Because of the uniqueness constraint on the
message_idfield we can only insert the same email once. If we try again we'll see the following error:{ "error": { "code": "23505", "details": "Key (message_id)=(<CALazKR8Zr8Lsv+SUAeuaL-vrhWSCK36TRU8=7HjsenxwaP9ZbA@mail.gmail.com>) already exists.", "hint": null, "message": "duplicate key value violates unique constraint \"incoming_emails_message_id_key\"" } }
Deploying the function
Deploying to Supabase is very easy. If you've not already linked your application
to the Supabase CLI you may need to run supabase link first. However, assuming
you've already got the application setup, deploying the function is as easy as:
$ supabase functions deploy receive_email --no-verify-jwt

Version 1.30.3 is already installed
Bundling receive_email
Deploying receive_email (script size: 472.3kB)
Deployed Function receive_email on project kekumeoklrmpzjxcwxyz
You can inspect your deployment in the Dashboard: https://app.supabase.com/project/...
Notice that we're using the
--no-verify-jwtflag. This is because we're using basic authentication and not JWT authentication.
That's our code deployed to Supabase. We can now test it out by calling our function again with Postman. Hopefully we get the same result as above with an ID of the inserted record returned.
Receive a real email with Supabase
Now that we've got our function deployed to Supabase it's time to test it with a real email. We're going to use CloudMailin to send us an email and then we'll see if our function can handle it.
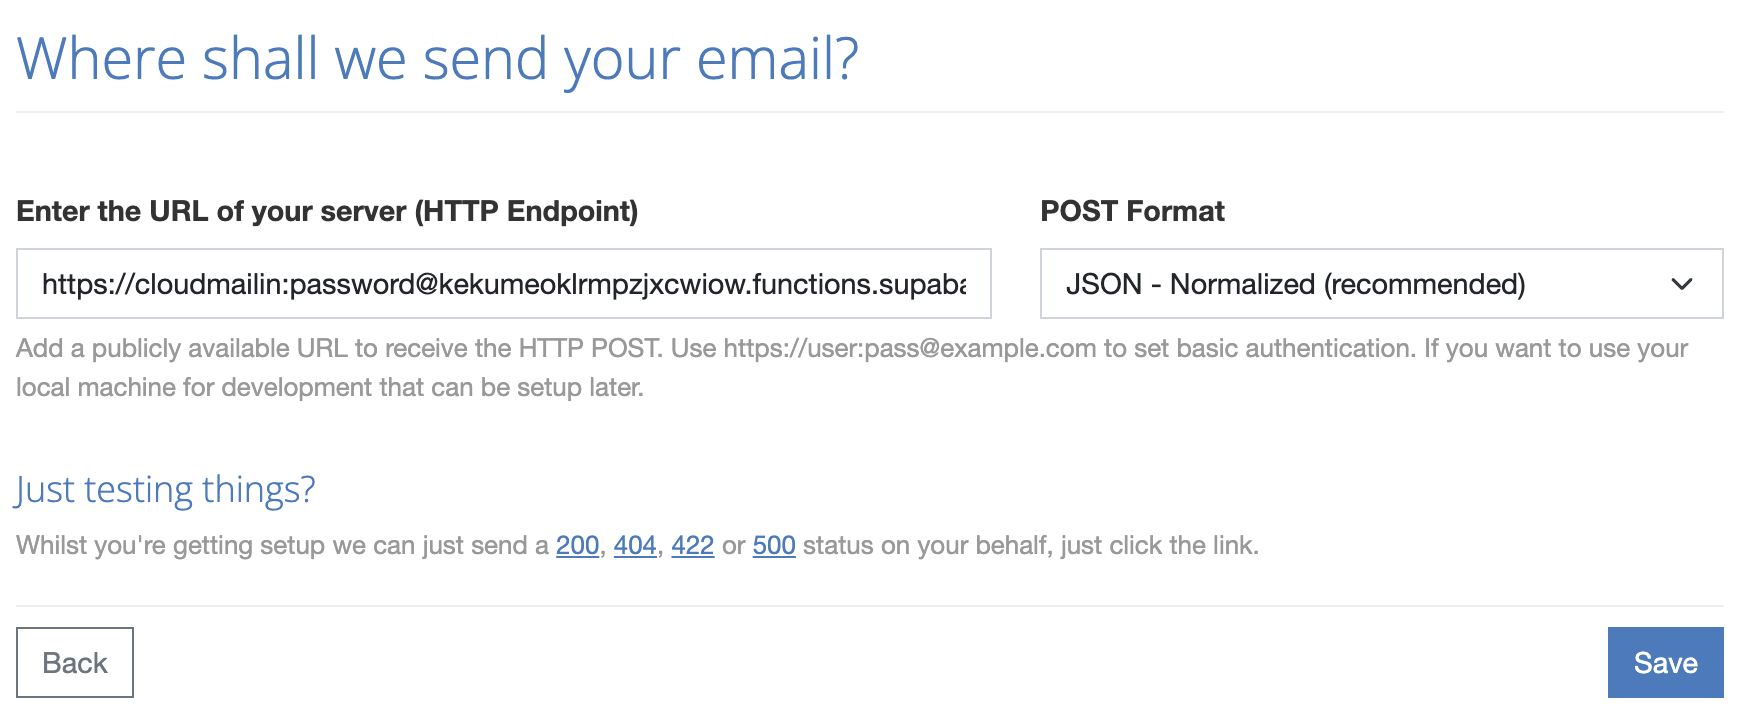
In CloudMailin we're going to add the URL to our function that was returned by
the deployment. We're also going to add the basic authentication username and
password into the URL itself so that CloudMailin knows how to authenticate with
the function. We're also going to choose the JSON format for the email.
This tells CloudMailin to make the email to webhook request with the email in
JSON, so that it is exactly what our function is expecting.
We can now send an email to the email address that CloudMailin has given us. If we remove the basic authentication username and password we can test what happens when we don't have the correct authentication.
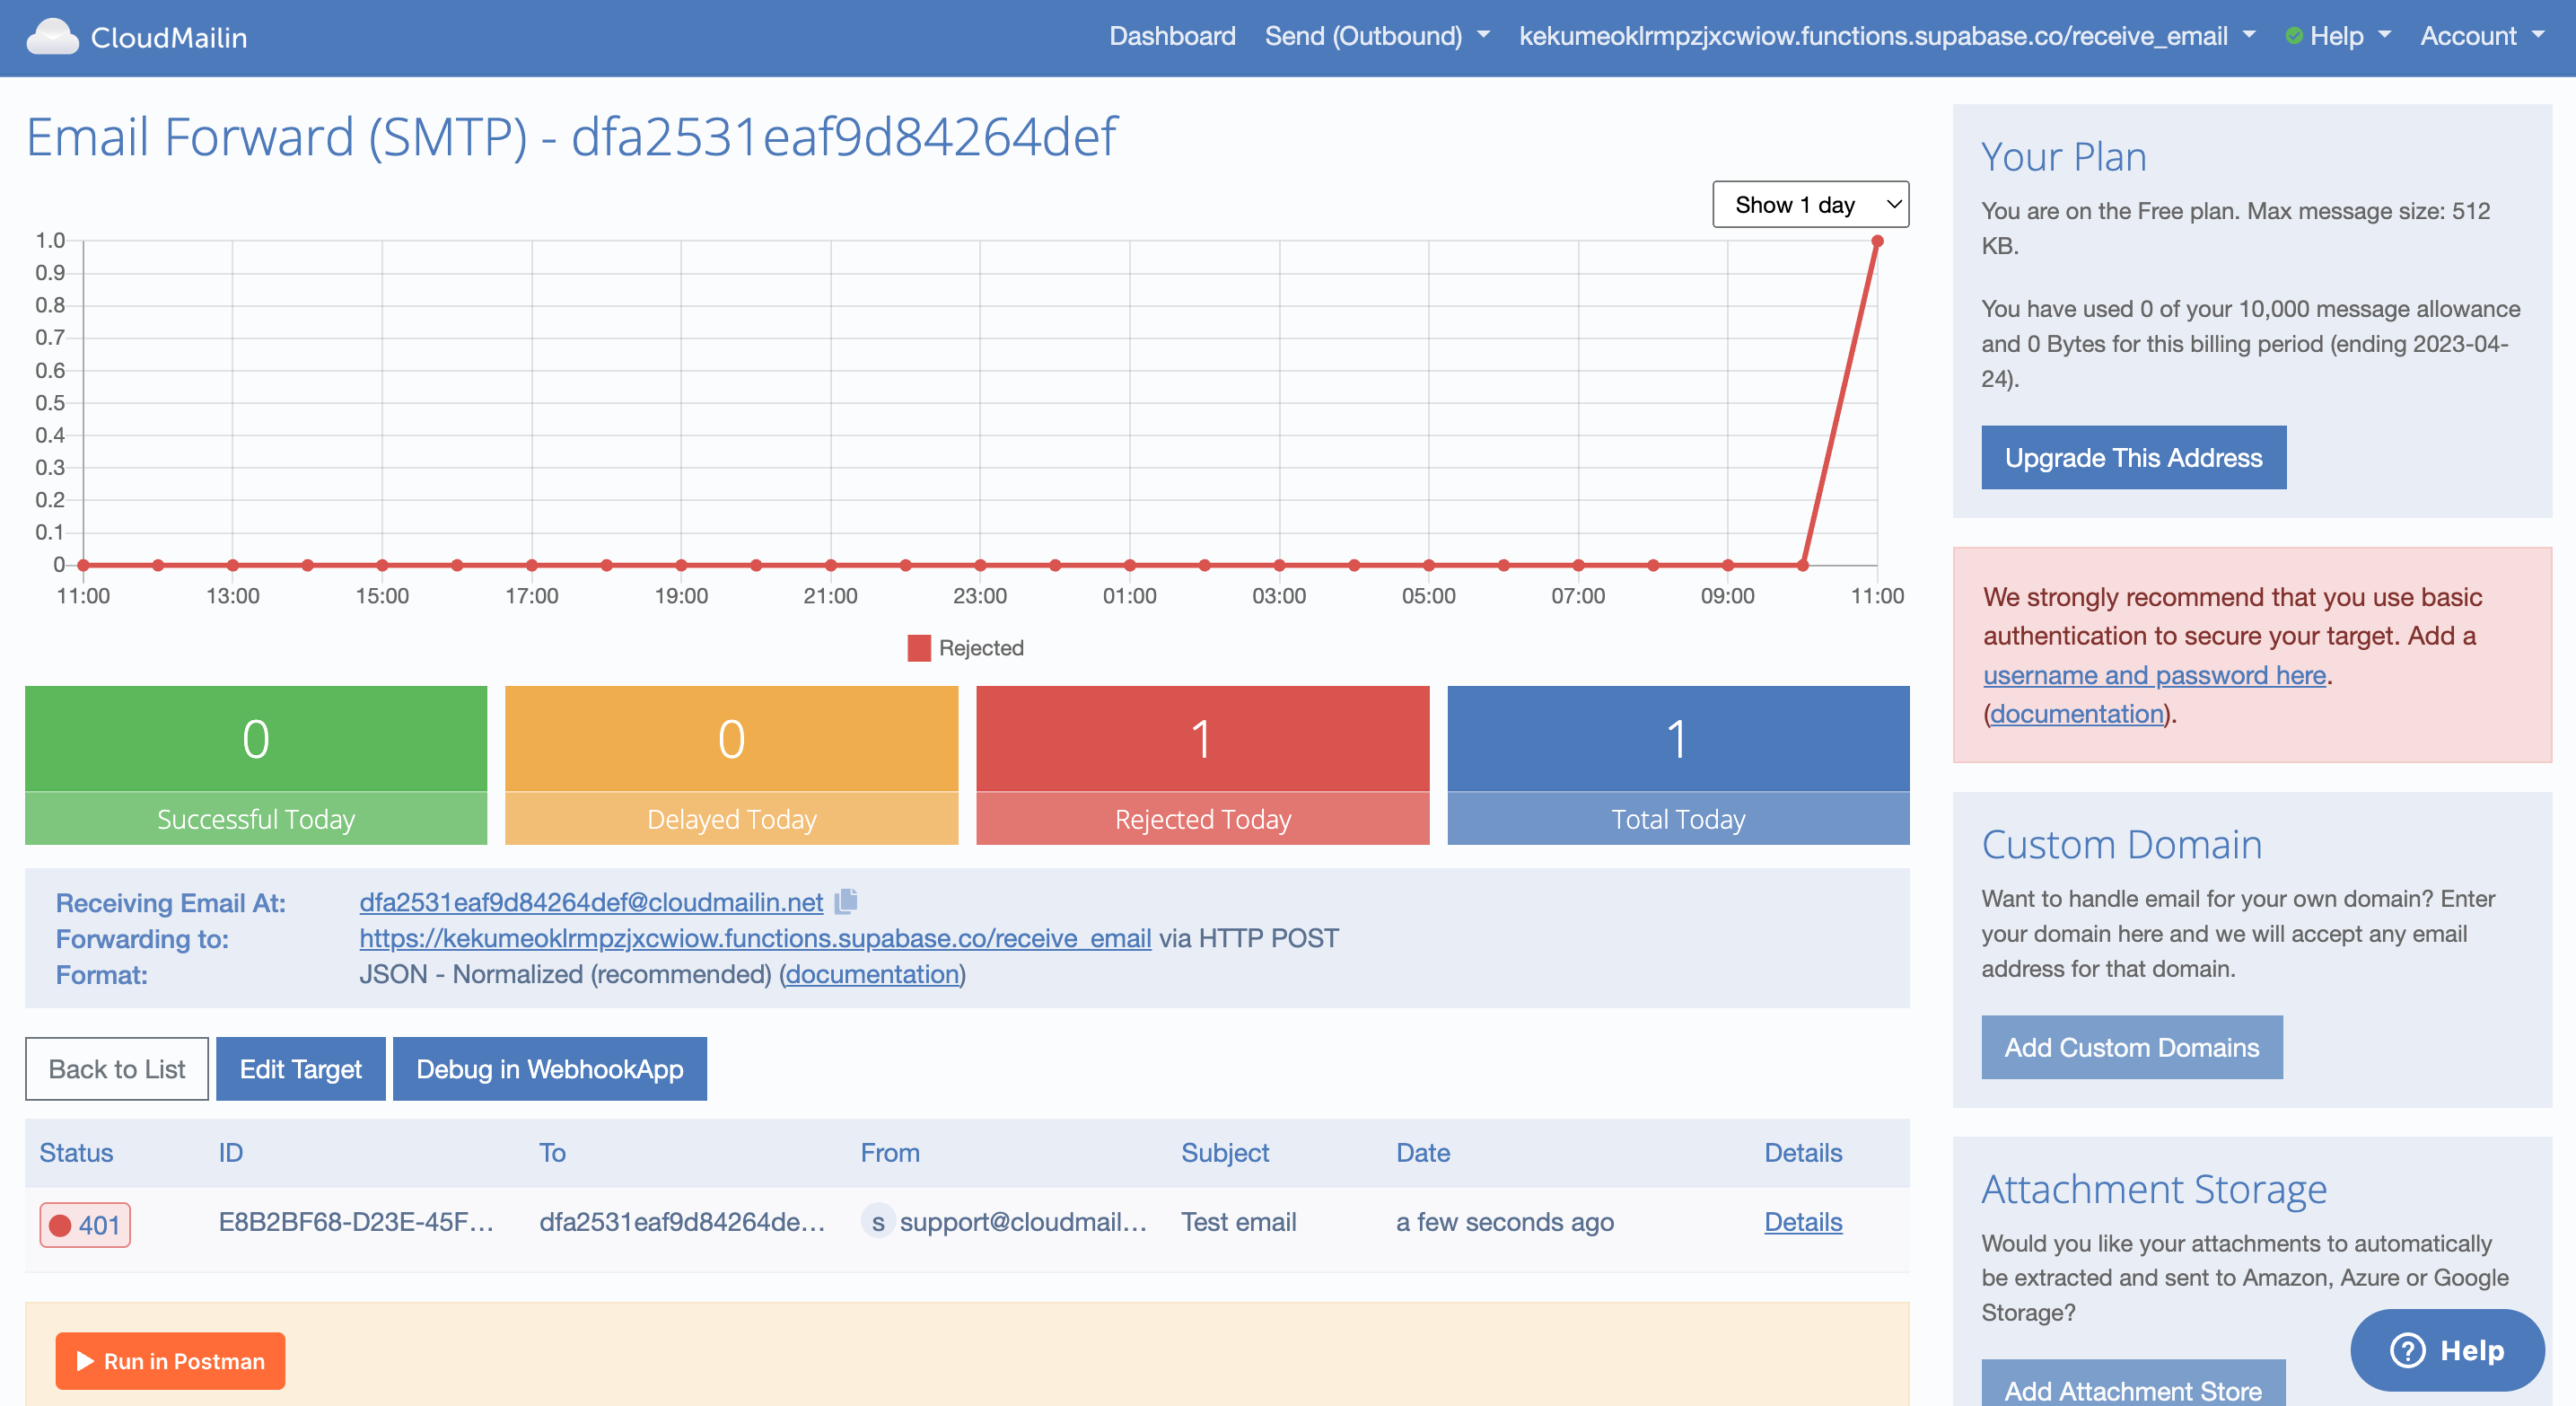
We can see that CloudMailin has bounced the email back to us. We can also see this bounced email as a rejected email in the CloudMailin dashboard. If we click on the details of the email we can see the error that was returned from our function.
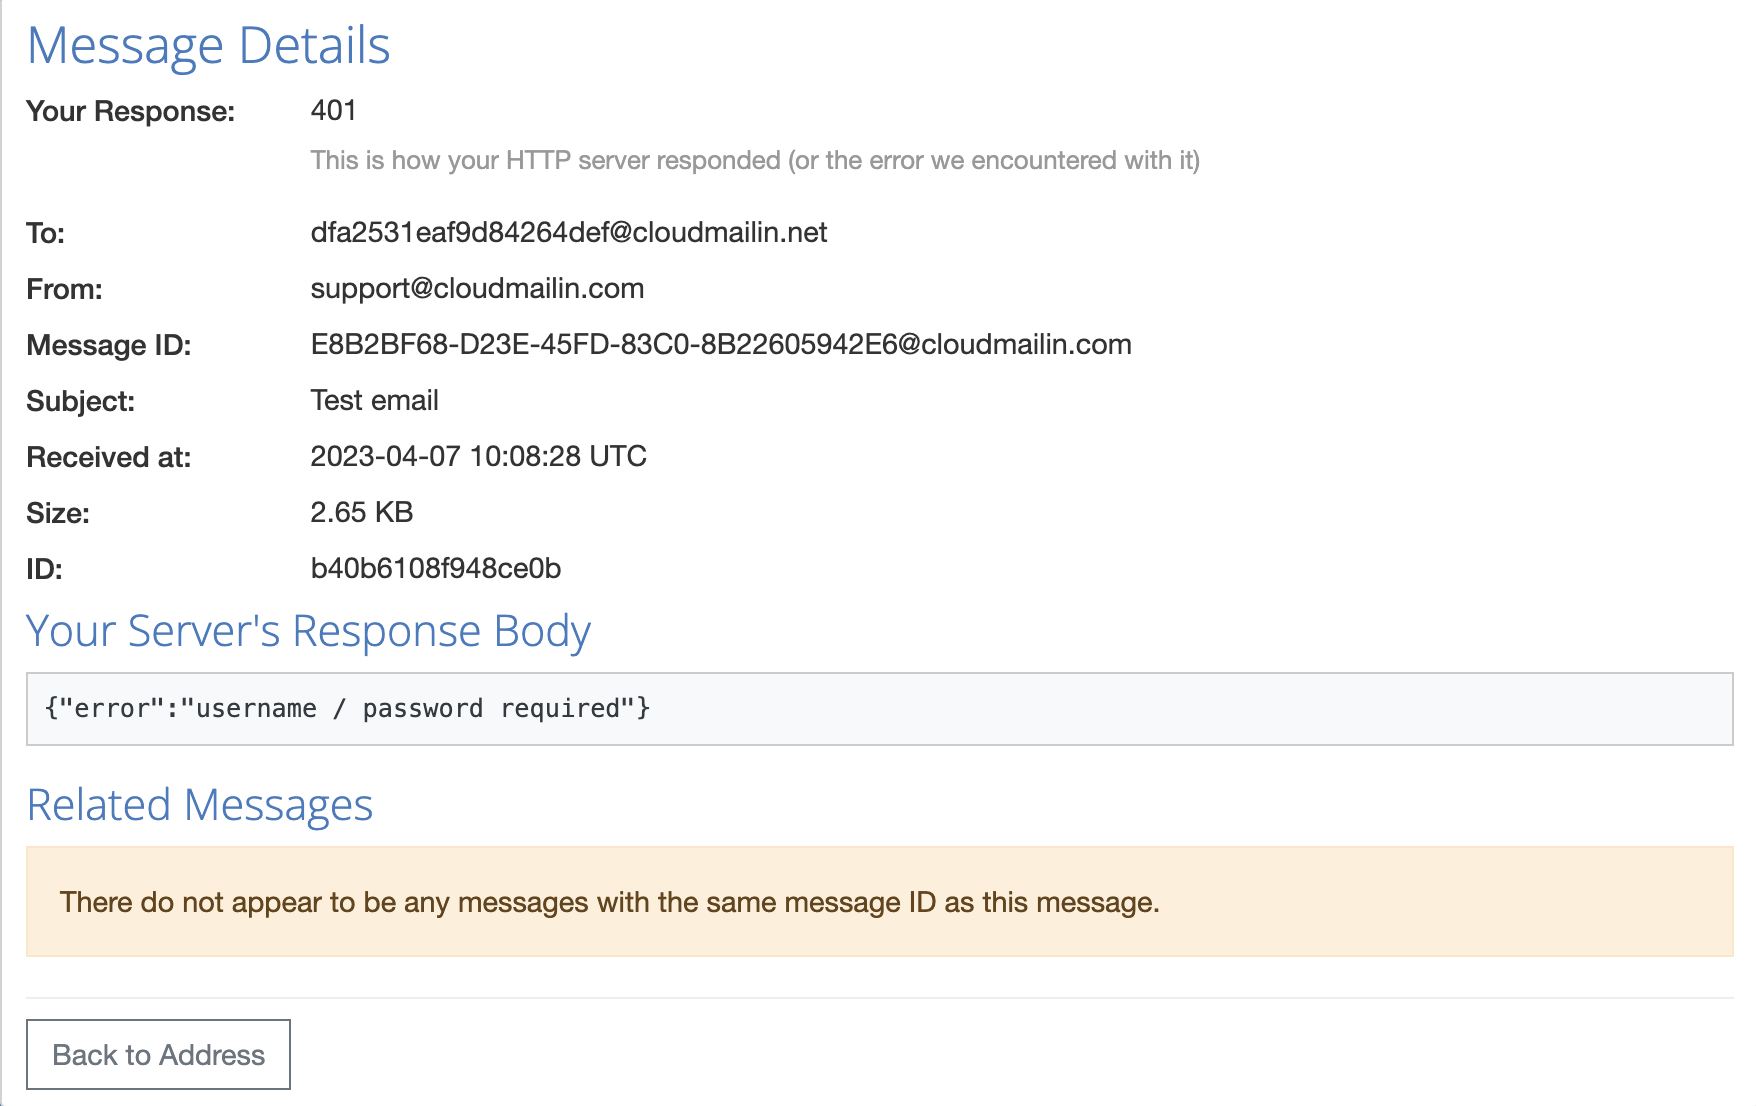
The details show the error message that was returned from our function. This would be the same method we would use to debug any issues with our function in future too.
Receiving the real email successfully
Now we can put the username and password back into the URL and send the email again. This time we should see the email successfully delivered to our function.
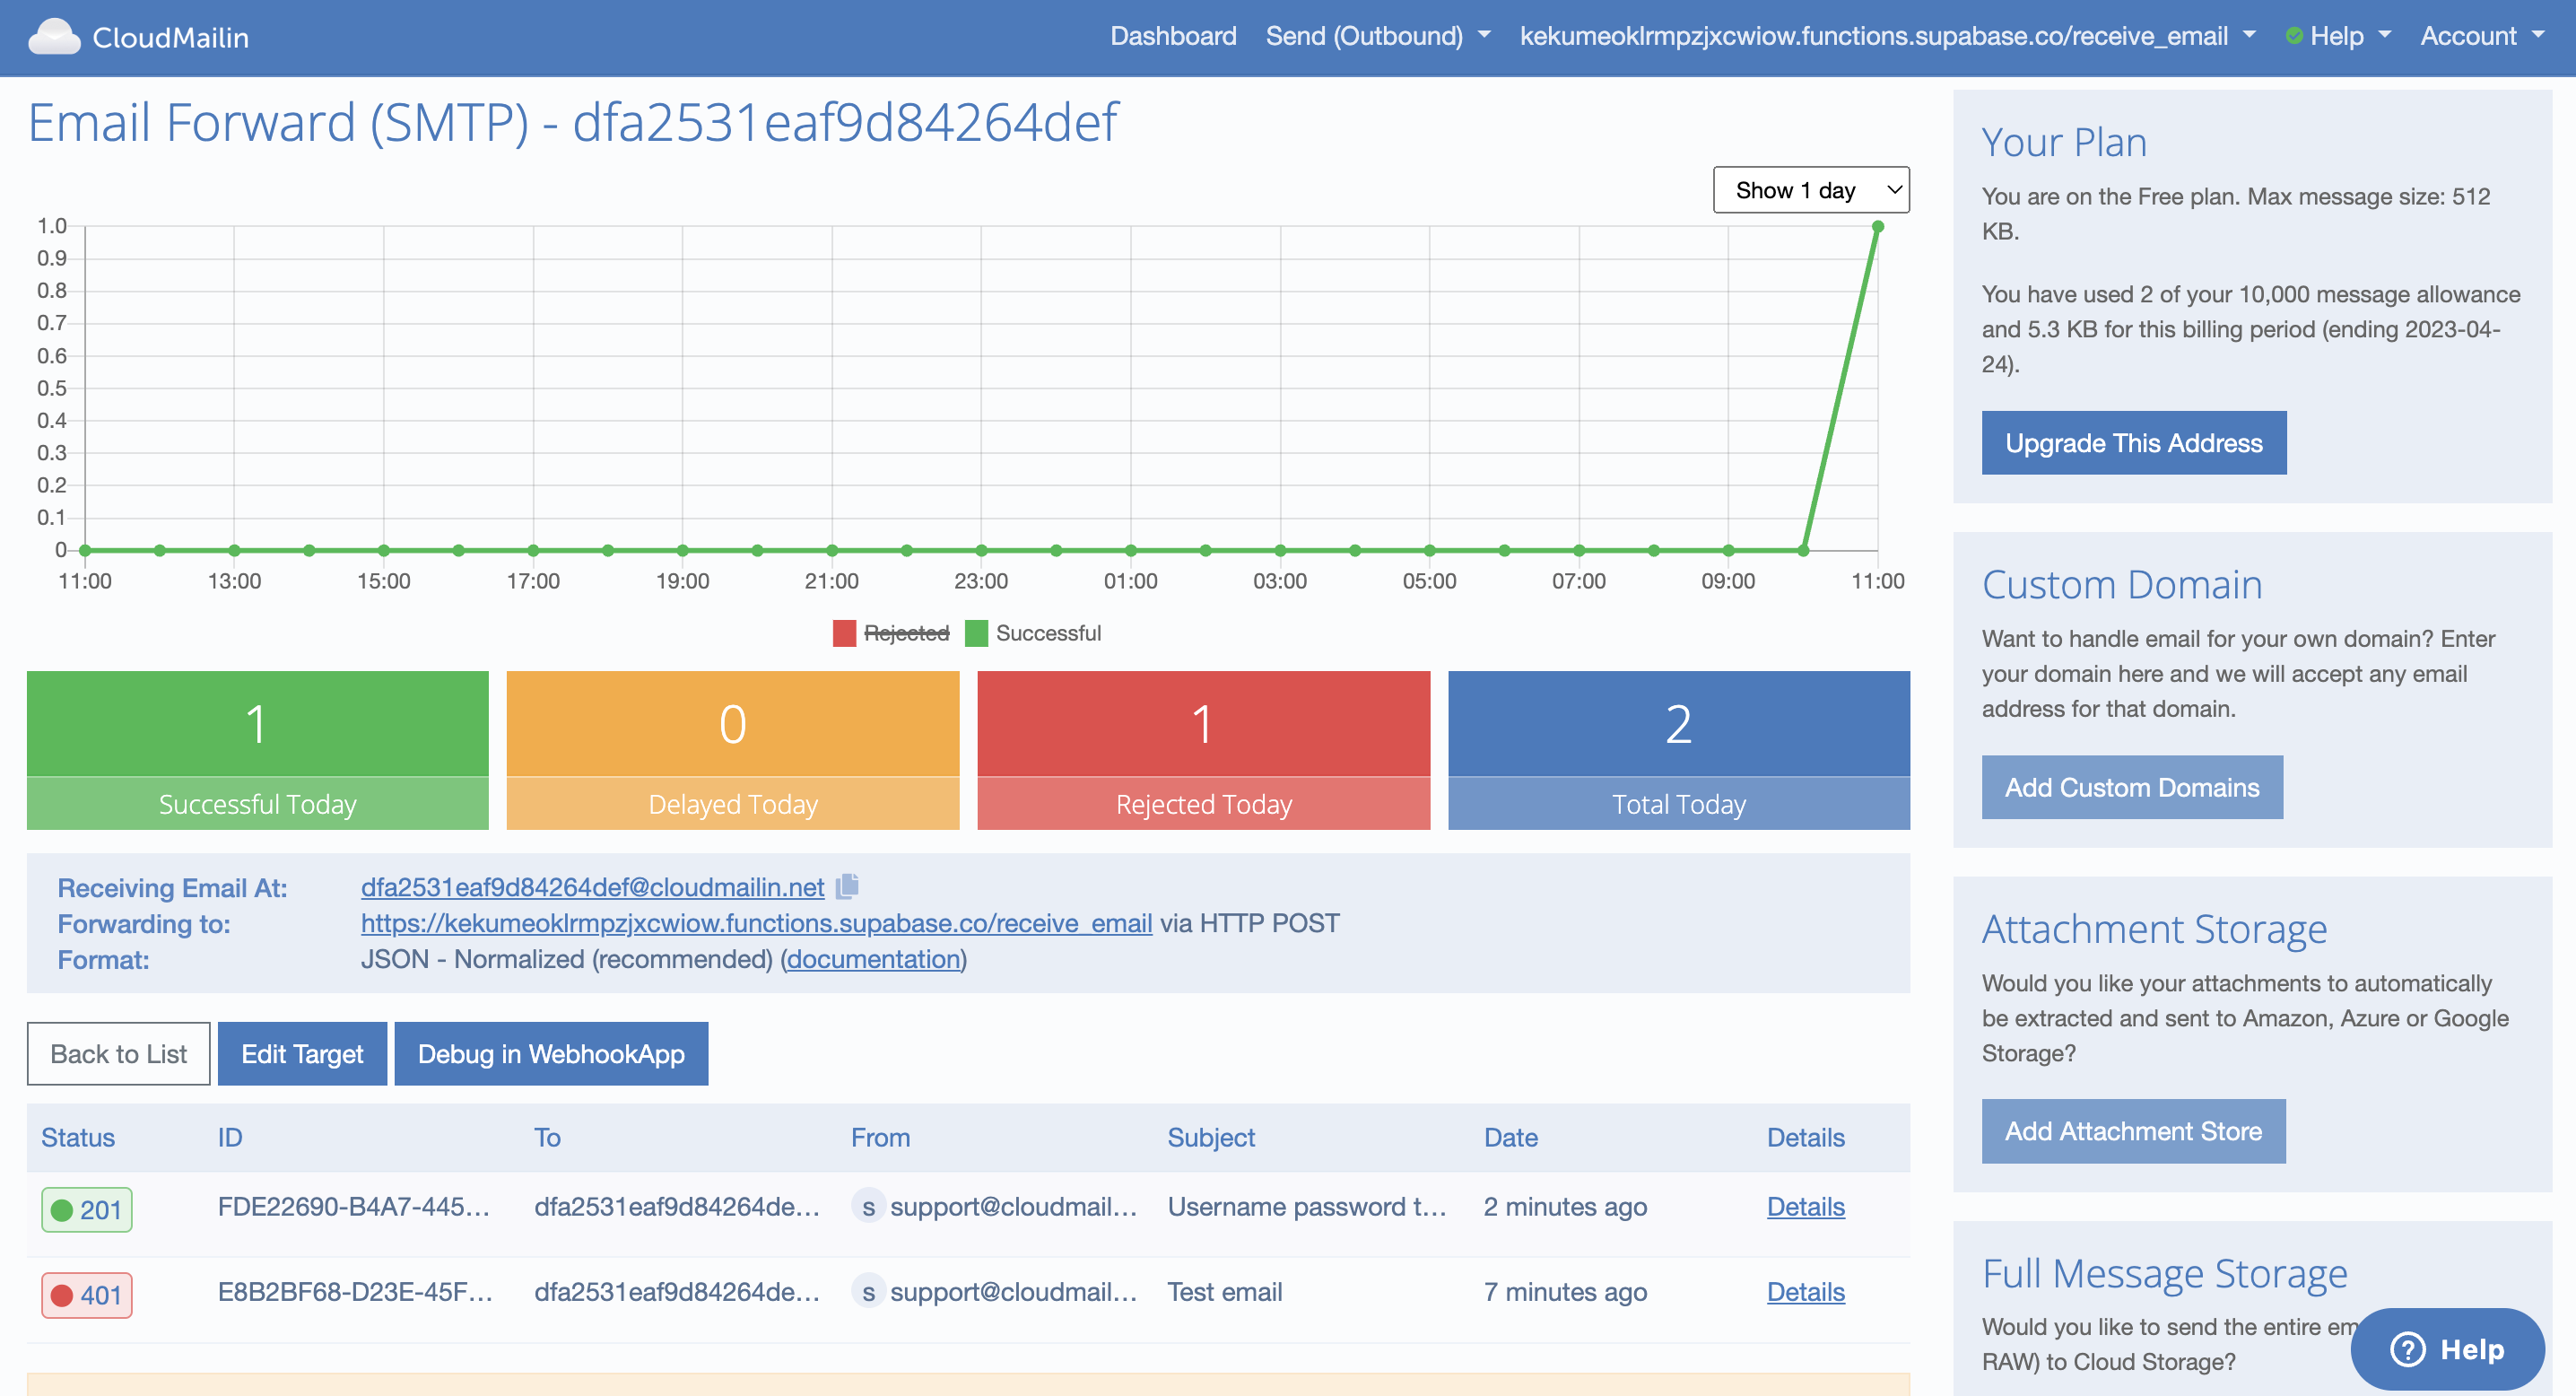
That's it! We've now successfully received an email with Supabase and we get the ID of the email returned to us. We can now check our Supabase dashboard to see the email that was inserted.
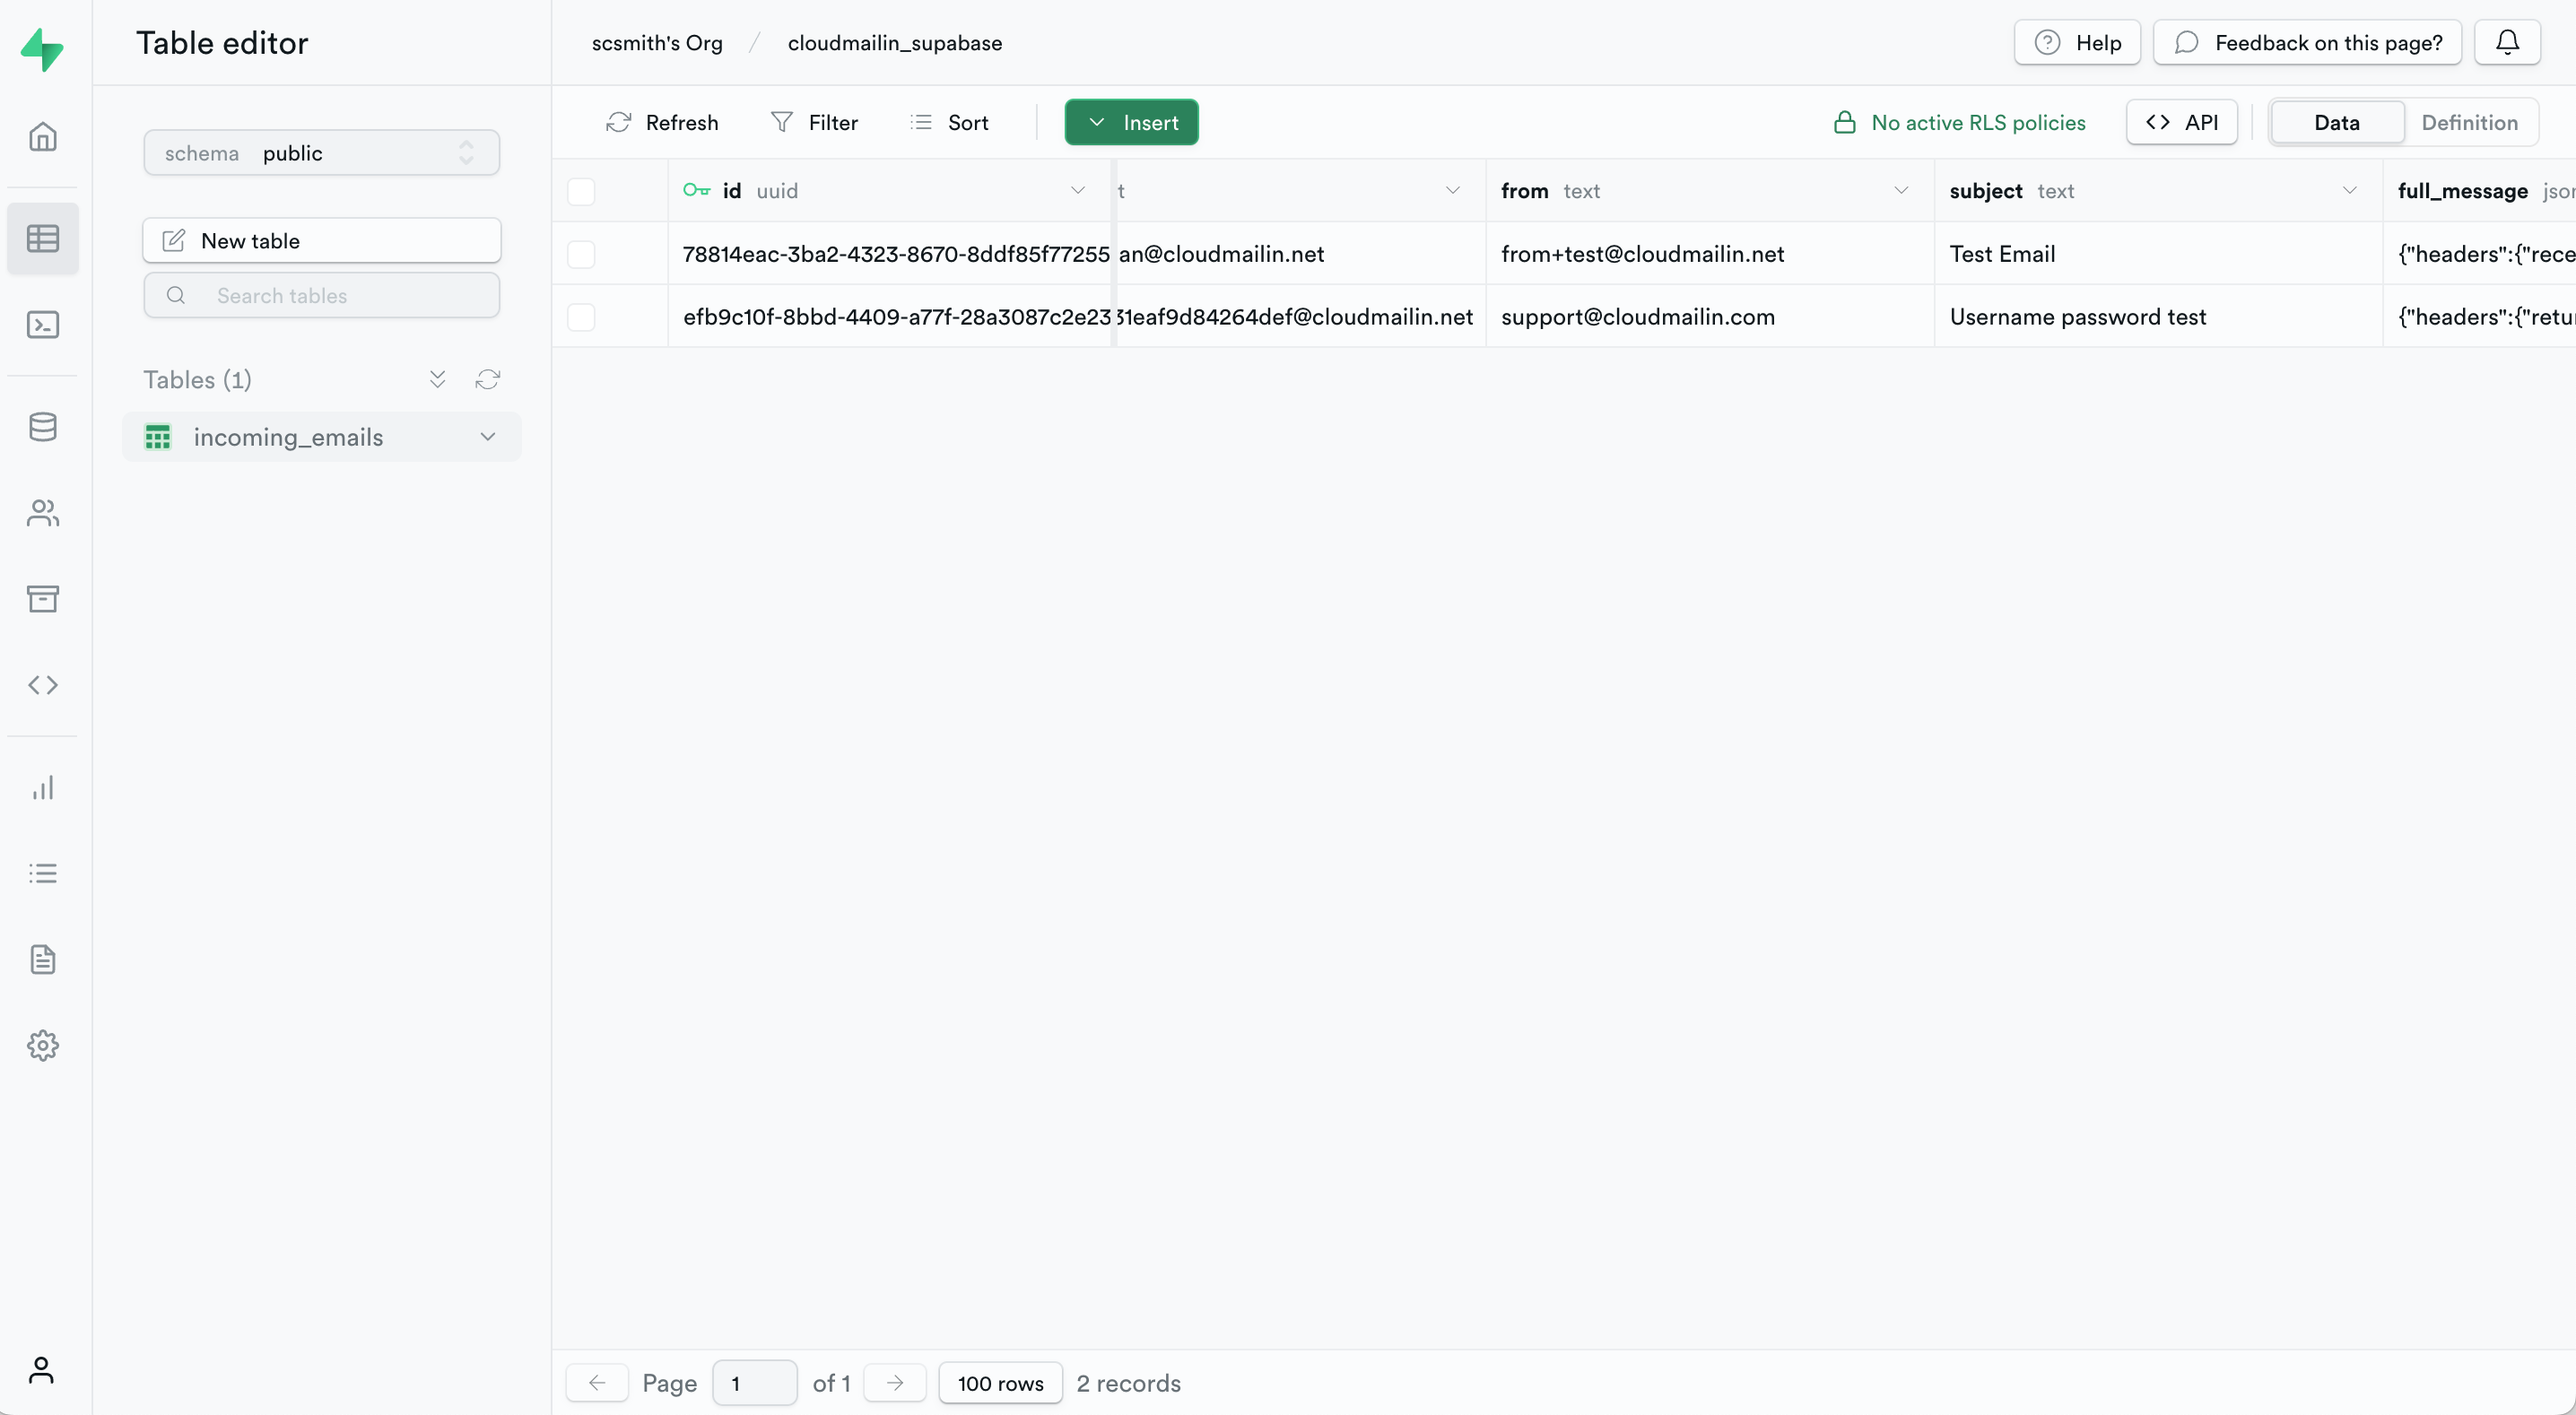
Congratulations you've now successfully received an email with Supabase and CloudMailin!
If you've got any questions or comments please reach out to us.
