Receive Email with Python and Django
CloudMailin allows you to receive any volume of email from within your website or application. Although we've had example code showing receiving email with Python for some time the examples needed a refresh to bring them up to date. We've just updated our just updated our documentation to include examples of receiving email in Python with Flask and Django.
Since our examples have been updated we figured it would be nice to add a blog post to show how easy it is to receive email with Django using CloudMailin's email to webhook.
Python email integration
Let's get started by creating a really simple script to receive email with Flask and then we can move to using Django.
The basic structure of email via JSON webhook
Before we get started, it's worth taking a quick look at our HTTP POST formats. For our Django email integration we'll be using the JSON format. The basic structure of our email will look like this:
{
"envelope": {
  "to": "to@example.com",
  "from": "from@example.net",
  ...
},
"headers": {
  "to": "To Address <to@example.com>",
  "from": "From Address <from@example.net>",
  "subject": "This is the subject",
  ...
},
"plain": "This is the plain text version of the email content",
"html": "This is the <strong>HTML version</strong> of the email content",
}
We've removed a bunch of the fields to make the example simpler but we can see the basic outline. The envelope contains fields relating to the actual SMTP transaction that CloudMailin received and the headers are from the actual email itself.
A basic Flask email integration
Great, so now that we know the structure of our email we can see that it's just a JSON object, something that flask is great at handing, let's create a basic route to receive our email.
from flask import Flask, request, jsonify

app = Flask(__name__)

@app.route('/incoming_emails', methods=['POST'])
def cloudmailin_webhook():
    # Get the JSON data from the POST request
    data = request.get_json()

    # Access specific fields from the JSON data
    subject = data.get('headers', {}).get('subject', 'No Subject')
    from_email = data.get('envelope', {}).get('from', 'No Sender')

    # Print the extracted fields to the console
    print(f"Subject: {subject}")
    print(f"From: {from_email}")

    return jsonify(status='ok')

if __name__ == "__main__":
    app.run(host='0.0.0.0', debug=True)
Here we've got a basic flask app with an /incoming_mails route that will
be used to receive our email. The route starts by getting all of the JSON data
and then specifically extracts the subject and from fields. Finally, we print
those fields and return a JSON response to the CloudMailin webhook.
We can test our Flask email to webhook integration by running the app and using a tool like WebhookApp to expose our local server to the internet, using our Postman examples or by using curl.
curl -X POST -H "Content-Type: application/json" --data-raw '{
  "envelope": {
    "to": "to@example.com",
    "from": "from@example.net"
  },
  "headers": {
    "to": "To Address <to@example.com>",
    "from": "From Address <from@example.net>",
    "subject": "This is the subject"
  },
  "plain": "This is the plain text version of the email content",
  "html": "This is the <strong>HTML version</strong> of the email content"
}' http://localhost:5000/incoming_emails
Great, so we've now shown how easy it is to receive email with Python and Flask. Let's move on to Django.
Our documentation continues with a few more examples using Flask so you may want to check that out if you're interested.
How can we receive email with Django?
Django is a powerful high-level framework for Python, designed to streamline the development of applications handling JSON. Leveraging CloudMailin's email to webhook feature, it becomes incredibly straightforward to route emails to your Django application in JSON format.
These examples use Django 4.2.5 and Python 3.11.5 but it should be relatively straightforward to adapt them to other versions if required.
Similarly to our Flask email example we'll start by adding an /incoming_emails
route to our urls.py file.
# cloudmailin_example/urls.py
from django.contrib import admin
from django.urls import path
from cloudmailin_example.views import cloudmailin_webhook

urlpatterns = [
    path('admin/', admin.site.urls),
    path('incoming_emails/', cloudmailin_webhook),
]
Next, we'll create a views.py file to handle the incoming email.
# cloudmailin_example/views.py
from django.http import JsonResponse
from django.views.decorators.csrf import csrf_exempt
import json

@csrf_exempt
def cloudmailin_webhook(request):
    if request.method == 'POST':
        # Get the JSON data from the POST request
        data = json.loads(request.body)

        # Access specific fields from the JSON data
        subject = data.get('headers', {}).get('Subject', 'No Subject')
        from_email = data.get('envelope', {}).get('from', 'No Sender')

        # Print the extracted fields to the console
        print(f"Subject: {subject}")
        print(f"From: {from_email}")

        return JsonResponse({'status': 'ok'})
    else:
        return JsonResponse({'status': 'bad request'}, status=405)
Here we've got a basic example, again taking the Subject and From fields, outputting them to the console and finally returning a JSON response with status ok.
There are also a couple of other things to note here. Firstly, we've added the
@csrf_exempt decorator to our view. This is because CloudMailin is an external
application so it cannot know the CSRF token that Django requires. Secondly, we
check the request method and return a 405 if it's not a POST request.
So isn't disabling CSRF a security risk? Well, yes, if we didn't trust who was able to send email to our webhook. However, we can protect our webhook so that only CloudMailin can send email to it. We do this by adding basic authentication.
Protecting our Django email integration with Authentication
CloudMailin allows you to add basic authentication to your webhook. This means that requests will include a basic authentication header with a username and password that we add to our CloudMailin webhook.
from django.http import JsonResponse
from django.views.decorators.csrf import csrf_exempt
from django.views.decorators.http import require_POST
from http import HTTPStatus
import json
import base64

def basic_auth_required(view_func):
    def _wrapped_view_func(request, *args, **kwargs):
        if 'HTTP_AUTHORIZATION' in request.META:
            auth_data = request.META['HTTP_AUTHORIZATION'].split()
            if len(auth_data) == 2:
                if auth_data[0].lower() == "basic":
                    username, password = base64.b64decode(auth_data[1]).decode('utf-8').split(':')
                    if username == 'cloudmailin' and password == 'password':
                        return view_func(request, *args, **kwargs)
        response = JsonResponse({'status': 'unauthorized'}, status=HTTPStatus.UNAUTHORIZED)
        response['WWW-Authenticate'] = 'Basic realm="CloudMailin"'
        return response
    return _wrapped_view_func

@csrf_exempt
@require_POST
@basic_auth_required
def cloudmailin_webhook(request):
    # Get the JSON data from the POST request
    data = json.loads(request.body)

    # Get the 'to' field from the 'envelope' dictionary
    to_email = data.get('envelope', {}).get('to')

    # Validate the 'to' address
    if to_email != 'to@example.com':
        return JsonResponse({'status': f"invalid to: {to_email}"}, status=HTTPStatus.UNPROCESSABLE_ENTITY)

    # Access specific fields from the JSON data
    subject = data.get('headers', {}).get('subject', 'No Subject')

    # Get the URL of the first attachment
    attachments = data.get('attachments', [])
    first_attachment_url = attachments[0]['url'] if attachments else None

    # Print the extracted fields to the console
    print(f"Subject: {subject}")
    print(f"First attachment URL: {first_attachment_url}")

    return JsonResponse({'status': 'ok'})
Now this example is a little more complex. Firstly, we've added a decorator to require that the request is a POST request. Secondly, we've added a decorator that checks the basic authentication header and returns a 401 if the username and password don't match.
In addition we've added a check to ensure that the to field of the envelope
matches the email address that we're expecting. It's really just here to show
an example of rejecting a message if it's not what we expect.
Rejecting messages like this can be really useful to protect against SPAM if you're receiving email with your own domain and don't want to just receive all email sent to that domain.
With CloudMailin HTTP Status Codes matter. If you return a 200 status code CloudMailin will assume that everything is ok and will not retry the webhook. If you return a 4xx status code CloudMailin will bounce the email during the SMTP transaction and a 5xx status code will ask the sending email server retry the email later.
How can we receive email attachments with Django?
You may also note that the example above shows an attachment being accessed and outputs the URL of the first attachment.
CloudMailin allows you to receive email attachments via HTTP POST. They can be uploaded directly to Cloud Storage (such as AWS S3, Azure or Google Cloud), or passed via Base64 encoding in the JSON payload.
In this example we're automatically uploading attachments to Cloud Storage and just outputting the URL of the first attachment. This offloads a lot of the work and allows our endpoint to remain lightning fast without having to handle large file uploads. We can also perform async processing to take more actions on our received emails.
If you're interested in receiving email attachments with Django then check out our documentation for more details.
Conclusion: Sending real email to our Django email integration
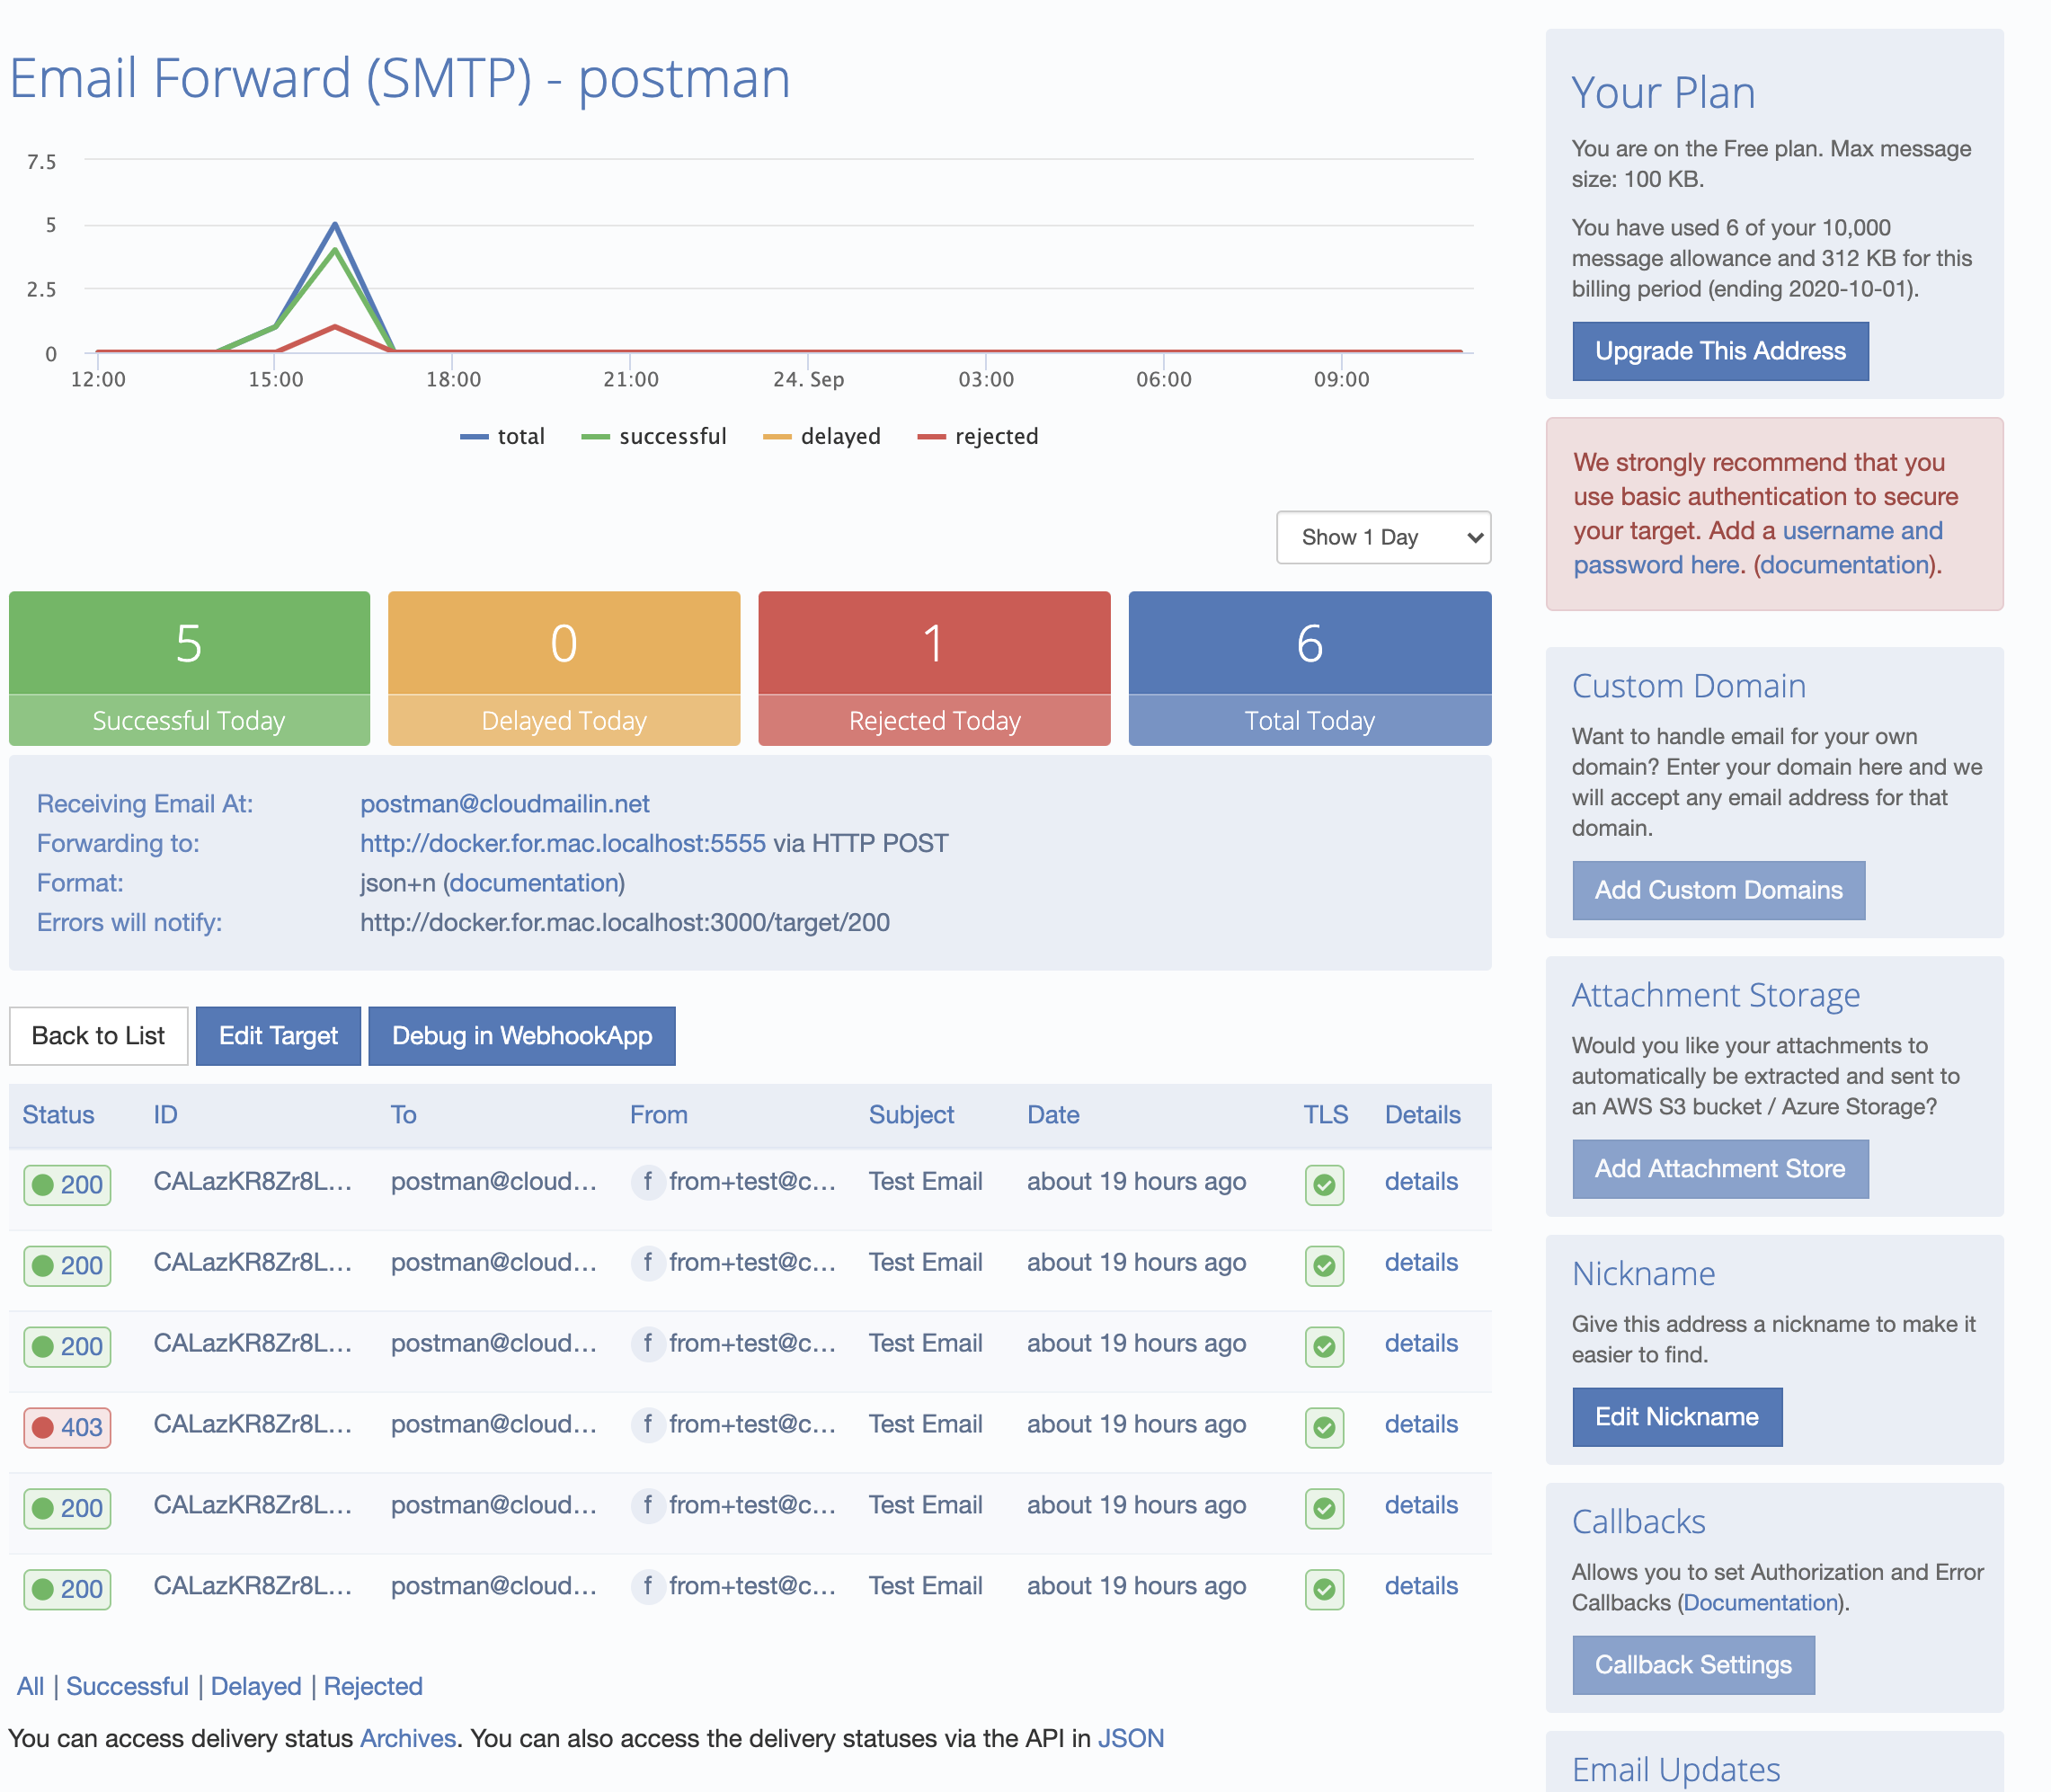
Now that we have our code in place we can deploy it and send a real email to our Django application:

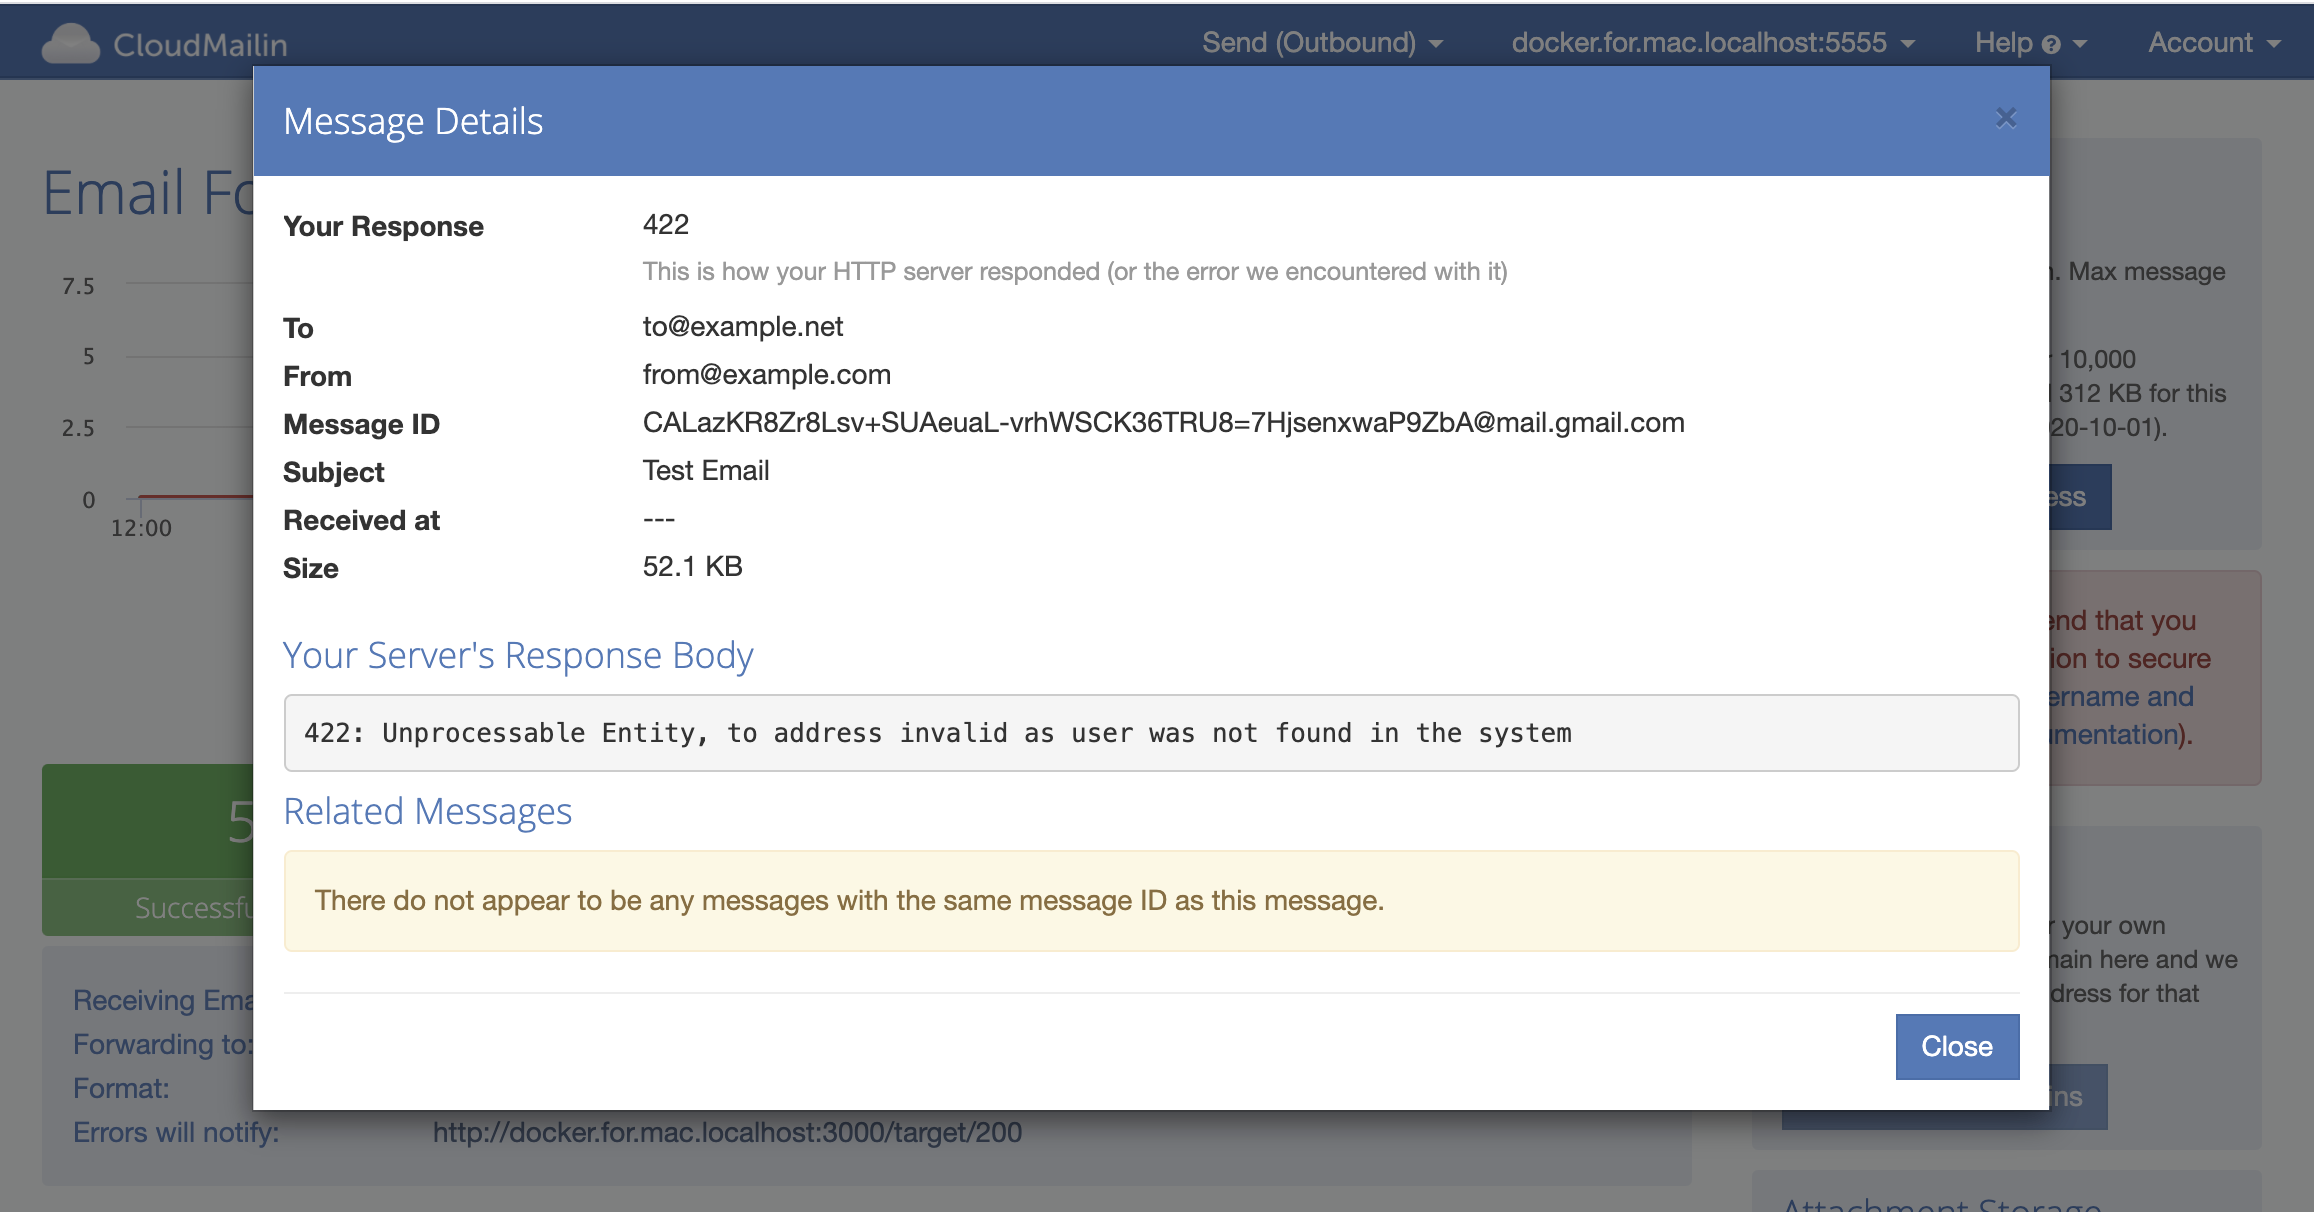
When we send an email, the details are listed in the dashboard. Here we can dig in and see the details. If the HTTP response of your server does not return a 2xx status code then the response will be recorded (see HTTP Status Codes):

That way we can debug any emails that don't appear as we expect. As always if you have any questions or want to give things a try feel free to Contact Us.
Sending email with Python
In addition to receiving email, CloudMailin also allows you to send email via SMTP or HTTP API. Checkout the sending email with Python section of our documentation for more details.


